Mobile Devices Forensics

Introduction
Mobile devices have become an integral part of our daily lives, and with the rise of mobile computing, the need for mobile device forensics has become increasingly important. Mobile device forensics is the process of collecting, analyzing, and preserving digital evidence from mobile devices for investigative purposes. In this research project, we will focus on testing the forensic acquisition of an Android Studio emulator, which is a popular tool used by developers to test their Android applications. We will explore the process of setting up the emulator and acquiring the types of data that can be extracted for forensic analysis. We will also discuss some of the challenges and limitations of performing a forensic acquisition on an Android emulator and provide tips on how to overcome them. So, if you’re interested in mobile device forensics and want to learn more about the forensic acquisition of an Android Studio emulator, read on!
Forensic Acquisition Tools and Environment
Listed below are the hardware and software specs that I used when performing this research project. Please note that if root access is needed for a forensic acquisition, Android Studio provides this documentation for their users:
Hardware
- HP Spectre x360 Convertible, 64-bit
Software
- Windows 11
- Android Studio Flamingo | 2022.2.1 Patch 1
- Emulated Pixel 6 Pro API UpsideDownCake, Google Play Store disabled (rooted)
- Android SDK Manager
- Autopsy 4.20.0
Step 1: Setup your tools with the Android SDK Manager
The Android SDK Manager helps download SDK tools, platforms, and other components needed to develop apps. To open the SDK Manager from Android Studio, Click Tools > SDK Manager. When an update is available for a package you already have, a dash appears in the checkbox next to the package.
- To update an item or install a new one, select the checkbox.
- To uninstall a package, click to clear the checkbox.
Pending updates for a package are indicated in the left column with a download icon. Pending removals are indicated with a red X. To update the selected packages, click Apply or OK and agree to any license agreements.
Required packages:
- Android SDK Platform: under the SDK Platforms tab, you must install at least one version of the Android platform so you can compile your app. I selected Android UpsideDownCake Preview because that is the API of my emulator.
- Android SDK Build Tools: under the SDK Tools tab, includes tools to build Android apps
- Android SDK Command-Line Tools: under the SDK Tools tab
- Android Emulator: under the SDK Tools tab, it is a device-emulation tool that you can use to debug and test your applications in an actual Android runtime environment
- Android SDK Platform Tools: under the SDK Tools tab, includes various tools required by Android platform, including the adb tool
- Google USB Driver (ONLY required for Windows): Under the SDK Tools tab, includes tools to help you perform adb debugging with Google devices.
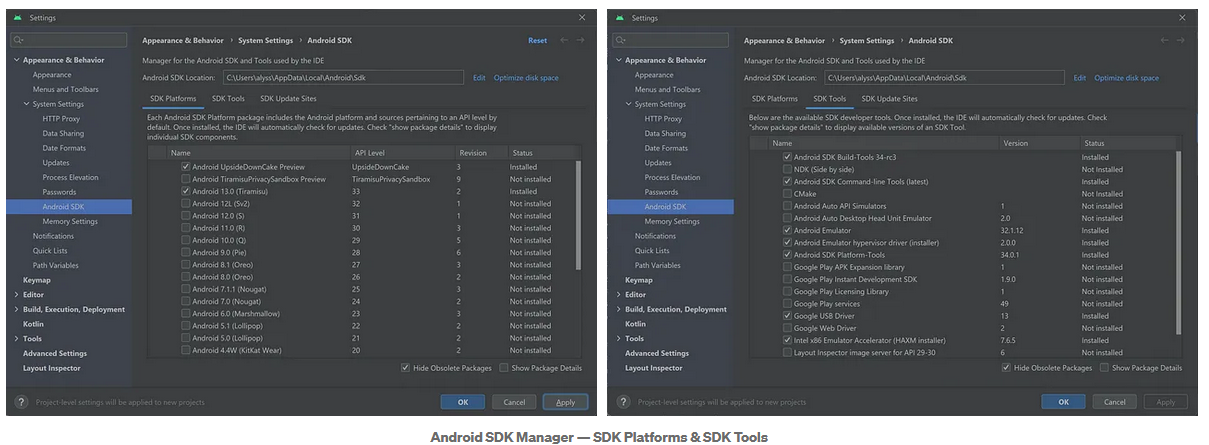
Optional packages:
- Google Play packages: if your emulated device has the Google Play Store enabled, you could install several of the Google Play Store packages available under SDK Tools. However, it is important to note that if you select an emulated device with Google Play Store enabled, you will not have root access. This can make the forensic process very difficult.
- Android Emulator hypervisor driver (installer): can provide a faster Android Virtual Device (AVD) experience.
- Intel x86 Emulator Accelerator (HAXM installer): if installed, will speed up Android emulation.
Step 2: Setup your Terminal to default to your Android SDK Platform Tools path
In Android Studio, go to File > Settings… > Tools > Terminal. Set the Start directory path to C:\Users\NAME\AppData\Local\Android\Sdk\platform-tools
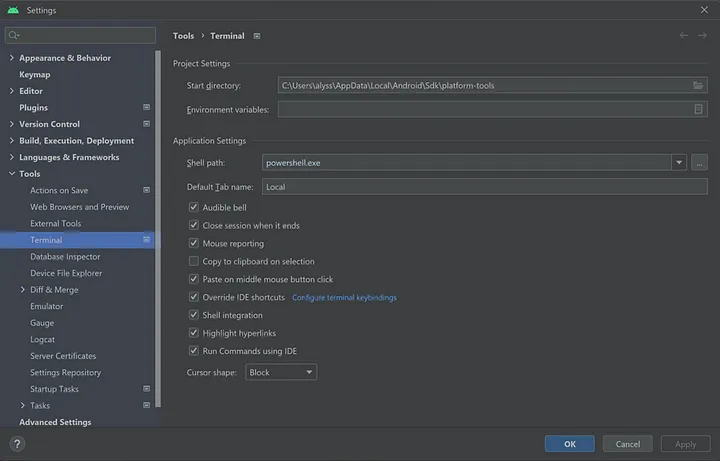
If you have already opened a terminal window, close it, and open a new local terminal. It should look like this:

Now, you have access to the adb command via the Android Studio terminal!
Step 3: Run the adb command to connect to your emulated device
With your Android device running, enter the following command into the terminal window:
     ./adb devices

This will give you the list of devices “attached”, or in this case, connected to our machine via the emulator. It should list your emulated device as shown below. 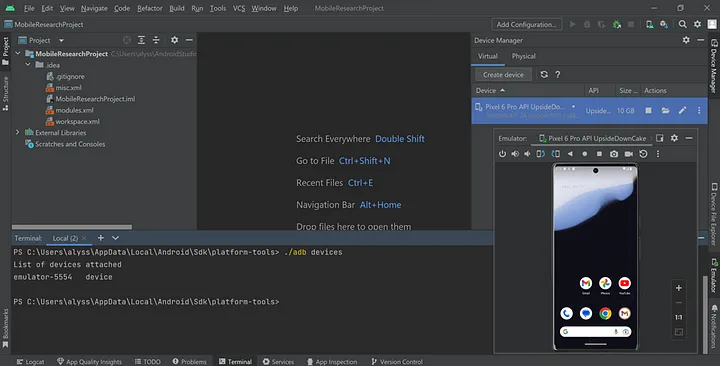
Now that we have seen that our emulated device is connected, we can begin the process of acquiring the forensic image. For the purposes of this research project, at this step, I began populating the Android device with test data by interacting with the installed applications.
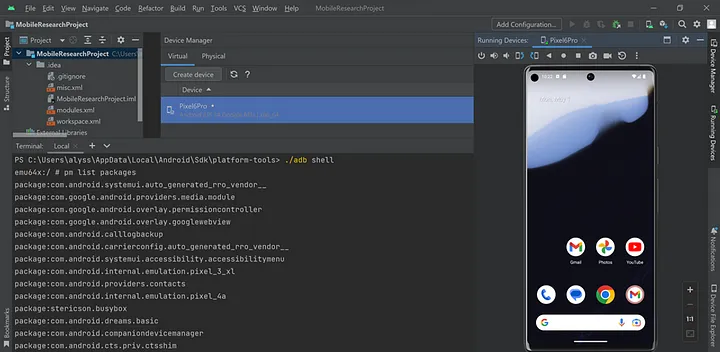
If you would like to see the list of packages within the emulated device before acquisition, you can run the following commands:
./adb root
This will ensure that you can have root access within the emulator.
./adb shell
This will open a terminal within the emulated device.
pm list packages
This will list all of the packages installed within the emulated device. It is a good indicator of the type of information available and what will be collected during the acquisition process.
To exit the emulated device shell, run the exit twice.
To get the mobile forensic image of the Android device, run the following command:
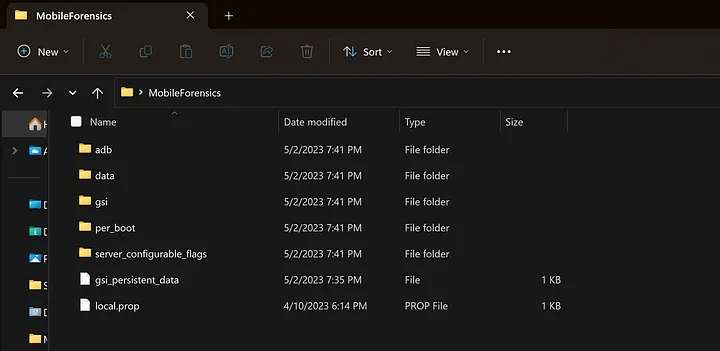
./adb pull -a /data DESTINATION_PATH 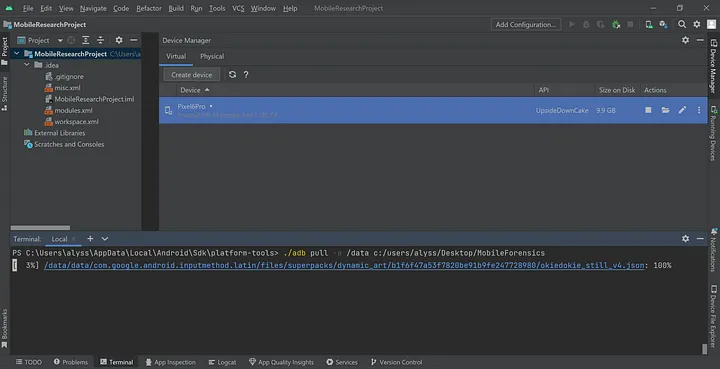
While the command is running, you will see progress updates on the files adb is pulling from the emulated device. Upon completion, you will find the mobile forensic image in the destination path.
Step 4: Analyze acquired Android emulated device image in Autopsy
For the purposes of this research project, I am choosing to use Autopsy to analyze my phone’s image. However, you can use any forensic analysis tool you would like.
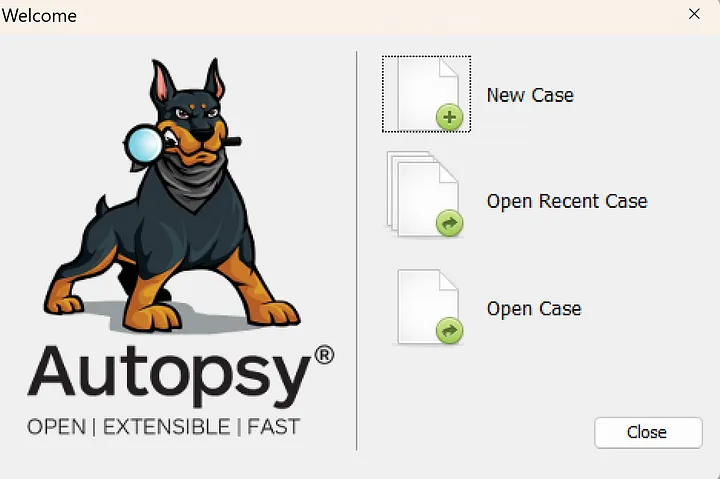
Open Autopsy and begin a New Case.
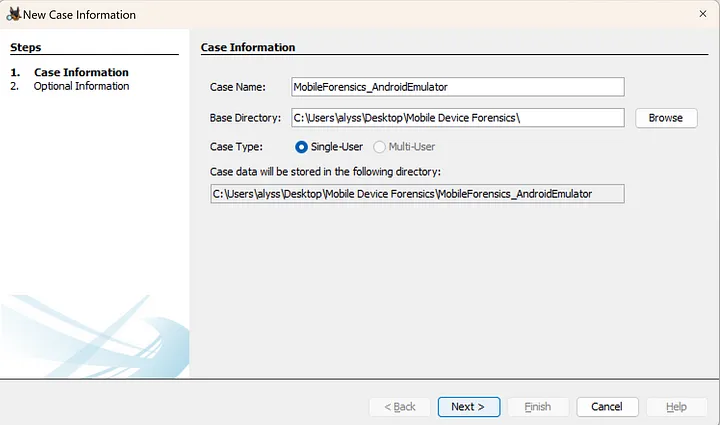
- Case Information
Enter a case name and the base directory for where you would like the case file to be stored. Click Next. If desired, fill in any optional information you would like. Click the Finish button when done and the case file will be created.
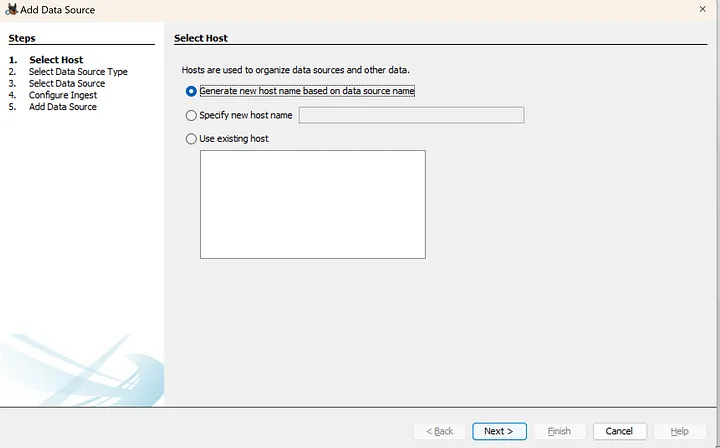
1. Select Host
Autopsy will then prompt you to select host and data source data. For the purposes of this research project, I selected the option of Generate new host name based on data source name. Click Next.
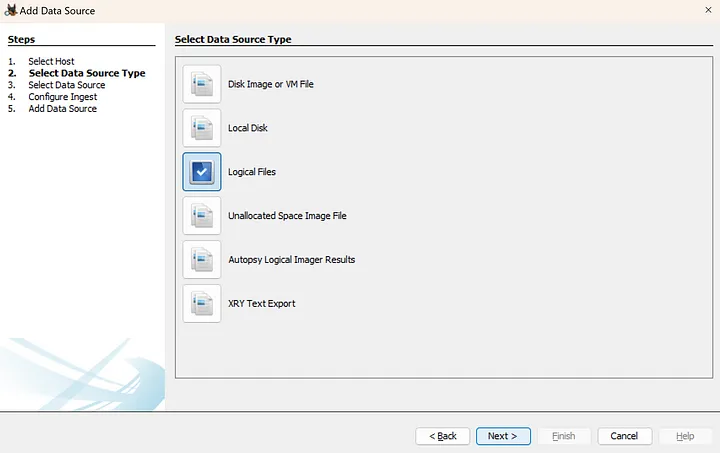
2. Select Data Source Type
Because of the method of acquisition, select Logical Files as the data source type for the mobile forensic image. Click Next.
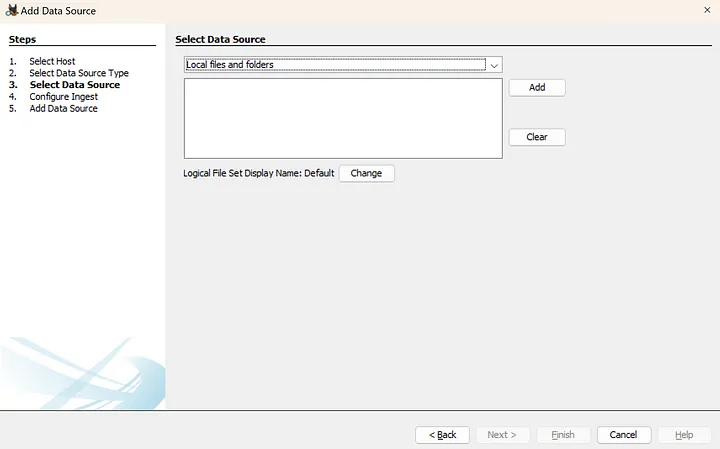
3. Select Data Source
In this step, the logical files must be selected. Clicking the Add button, upload the folder provided as the destination path in the adb pull command. Once uploaded, click Next.
4. Configure Ingest
Based on your needs, select the ingest modules you would like to run when analyzing the image. I have selected that the ingest modules be run on All Files, Directories, and Unallocated Space. Click Next. The data source will then be added. Click Finish.

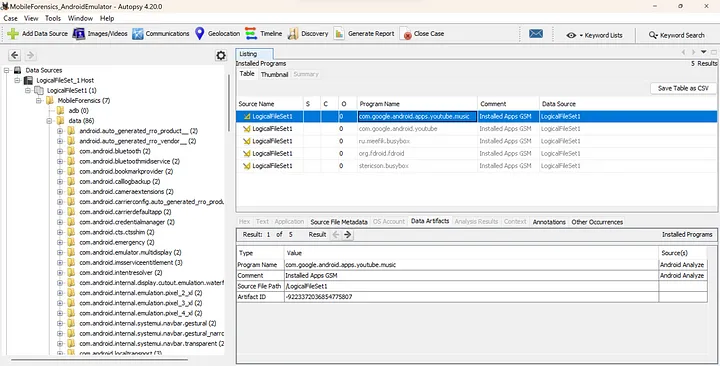
Step 5: Analyze Android emulated forensic file system image
For the purpose of this research project, I searched for the apps that I downloaded onto the emulated Android phone. Upon analysis I found them:
Conclusion
Mobile forensic analysis of emulated Android phones is important for the field of mobile forensics. Emulated phones are virtual machines that can mimic the behavior of a real Android device. This means that they can be used to run Android apps and execute other operations just like a physical Android device. Emulated phones can be used by developers, researchers, and testers to simulate the behavior of a physical Android device, aiming to develop more effective mobile forensic techniques to collect digital evidence.